一、什么是ELK?
E:Elasticsearch-数据存储、分析
L:LogStash-数据采集
K:Kibana-数据展示
由于Logstash在数据采集方面性能堪忧,所以一般来说在传统的ELK基础上还会引入Beats相关组件,用于采集信息,之后再传输给Logstash进行操作;
为何不直接将Beats采集的数据存入es呢?直接存入es使用其过滤功能有点大材小用,浪费es性能,所以仍需要Logstash作为数据的过滤层,同时Logstash中集成了很多第三方的插件。
elasticsearch的安装部署参见-elasticsearch(八)-集群 不在本文重新介绍,主要介绍ELK其余组件的安装部署
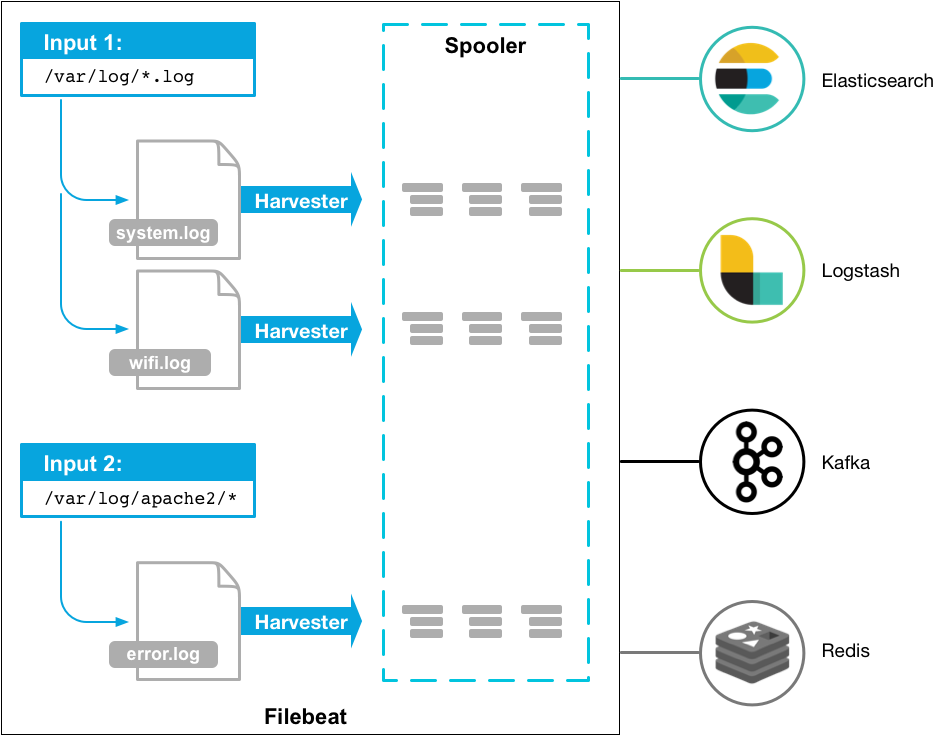
基于golang语言开发,开源的、轻量级的日志收集器的统称。
介绍 文件日志监控采集 ,主要用于收集日志数据
语法:yaml
1
2
3
4
5
6
7
8
filebeat.inputs: -input_type:log paths: -/var/log/apache/httpd-*.log -input_type:log paths: -var/log/messages -var/log/*.log
支持的输入配置
1
2
3
4
5
6
7
8
9
10
11
12
13
14
15
16
17
Azure Event Hub Cloud Foundry Container Docker Google Pub/Sub HTTP JSON Kafka Log MQTT NetFlow Office 365 Management Activity API Redis S3 Stdin Syslog TCP UDP
输出配置
1
2
3
4
5
6
7
8
9
10
11
12
13
14
15
16
17
18
a)支持的输出类型: Console Elasticsearch Logstash Kafka Redis File Elastic Cloud b)输出到Elasticsearch: output.elasticsearch: hosts: ["myEShost:9200"] username: "filebeat_internal" password: "YOUR_PASSWORD" setup.kibana: host: "mykibanahost:5601" username: "my_kibana_user" password: "YOUR_PASSWORD"
安装 1 2 tar -zxvf filebeat-7.7.0-linux-x86_64.tar.gz mv filebeat-7.7.0-linux-x86_64 filebeat-7.7.0
配置 1 2 3 4 5 6 7 8 9 10 11 12 13 14 15 16 17 18 19 20 21 22 23 24 25 26 27 28 29 30 31 32 33 34 35 36 37 38 39 40 41 42 43 44 45 46 47 48 49 50 51 52 53 54 55 56 57 58 59 60 61 62 63 64 65 66 67 68 69 70 71 72 73 74 75 76 77 78 79 80 81 82 83 84 85 filebeat.inputs: - type: log enabled: true paths: - /var/log/*.log - /var/log/mysqld.log tags: ["test_tag"] exclude_lines: ['^$'] - type: log enabled: true paths: /usr/local/nginx/logs/access.log tags: ["nginx-tag"] - type: log enabled: true paths: /usr/local/mylog.log tags: ["mylog-tag"] multiline: type: pattern match: after pattern: '^\[' negate: true output.elasticsearch: hosts: ["192.168.243.131:9200"] indices: - index: "warning-%{[agent.version]} -%{+yyyy.MM.dd} " when.contains: message: "WARN" - index: "error-%{[agent.version]} -%{+yyyy.MM.dd} " when.contains: message: "ERR" output.logstash: hosts: ["192.168.243.133:5044"]
Filebeat是读取日志是会记录到读取日志的行号,当重启或者删除es的索引,他依旧会从记录的那一行之后开始读,曾经读取过的数据不会再次读取,若想要重新全量读取,则需要去把data文件夹的数据删除。
启动 1 2 3 4 ./filebeat -e -c ./filebeat.yml nohup ./filebeat -e -c filebeat.yml >/dev/null 2>&1 &
问题-自动关闭 通过后台启动命令来启动filebeat,第二天早上发现filebeat自动关闭
在当shell中执行后台启动命令成功后,还需要按终端上键盘任意键退回到shell输入命令窗口,然后通过在shell中输入exit来退出终端;如果在后台启动命令执行成功后直接点关闭程序按钮关闭终端的话,这时候会断掉该命令所对应的session,导致nohup对应的进程被通知需要一起shutdown,起不到关掉终端后调用程序继续后台运行的作用。
解决方案:通过exit命令退出shell客户端。在启动完filebeat之后,在crt输入exit退出,此时filebeat不会随着客户端的关闭而退出
进行指标采集,指标可以是系统的,也可以是众多中间件产品的,主要用于监控系统和软件的性能
通过网络抓包、协议分析,基于协议和端口对一些系统通信进行监控和数据收集。是一个实时网络数据包分析器,可以将其与Elasticsearch一起使用,以提供应用程序监视和性能分析系统
1 2 3 4 5 6 7 8 9 10 11 12 13 14 ICMP (v4 and v6) DHCP (v4) DNS HTTP AMQP 0.9.1 Cassandra Mysql PostgreSQL Redis Thrift-RPC MongoDB Memcache NFS TLS
安装 1 2 tar -zxvf packetbeat-7.12.1-linux-x86_64.tar.gz mv packetbeat-7.12.1-linux-x86_64 packetbeat-7.12.1
配置 1 2 3 4 5 6 7 8 9 10 11 12 13 14 15 16 17 18 19 20 21 22 23 24 25 26 27 28 29 30 31 32 33 34 35 36 37 38 39 40 41 42 43 44 45 46 47 48 49 50 51 52 53 54 55 56 57 58 59 60 61 62 63 64 65 66 67 68 packetbeat.protocols: - type: icmp enabled: true - type: amqp ports: [5672] - type: cassandra ports: [9042] - type: dhcpv4 ports: [67, 68 ] - type: dns ports: [53] - type: http ports: [80, 8080 , 8000 , 5000 , 8002 ] - type: memcache ports: [11211] - type: mysql ports: [3306,3307] - type: pgsql ports: [5432] - type: redis ports: [6379] - type: thrift ports: [9090] - type: mongodb ports: [27017] - type: nfs ports: [2049] - type: tls ports: - 443 - 993 - 995 - 5223 - 8443 - 8883 - 9243 - type: sip ports: [5060] output.elasticsearch: hosts: ["192.168.243.131:9200"]
启动 1 ./packetbeat -e -c packetbeat.yml -strict.perms=false
介绍 Logstash是开源的流数据处理、转换(解析)和发送引擎,可以采集来自不同数据源的数据,并对数据进行处理后输出到多种输出源。
Logstash的数据处理过程主要包括:Inputs , Filters , Outputs 三部分
用于从数据源获取数据,常见的插件如beats、file、kafka、rabbitmq、log4j、redis等。
Filters 筛选器是Logstash管道中的数据处理器,input时会触发事件,触发filter对数据进行transport,即转换解析各种格式的数据,常见的过滤器插件如下:
1 2 3 4 5 6 grok:解析和构造任意文本。是Logstash过滤器的基础,广泛用于从非结构化数据中导出结构,当前,Grok是Logstash中将非结构化日志数据解析为结构化和可查询内容的最佳方法。 mutate:对事件字段执行常规转换。支持对事件中字段进行重命名,删除,替换和修改。 date:把字符串类型的时间字段转换成时间戳类型 drop:完全删除事件,例如调试事件。 clone:复制事件,可能会添加或删除字段。 geoip:添加有关IP地址地理位置的信息。
Outputs 用于数据输出,常见的插件如:
1 2 3 4 elasticsearch:最高效、方便、易于查询的存储器,最有选择,官方推荐! file:将输出数据以文件的形式写入磁盘。stupid graphite:将事件数据发送到graphite,graphite是一种流行的开源工具,用于存储和绘制指标。http://graphite.readthedocs.io/en/latest/ statsd:将事件数据发送到statsd,该服务“通过UDP侦听统计信息(如计数器和计时器),并将聚合发送到一个或多个可插拔后端服务”。
安装 1 2 3 4 5 tar -zxvf logstash-7.12.1-linux-x86_64.tar.gz -C logstash-7.12.1 vi config/jvm.option -Xms256m -Xmx256m
配置 1 2 3 4 5 6 7 8 9 10 11 12 13 14 15 16 17 18 19 20 21 22 23 24 25 26 27 28 29 30 31 32 33 34 35 36 37 38 39 40 41 42 43 44 45 46 47 48 49 50 51 input { beats { port => 5044 } } output { elasticsearch { hosts => ["http://192.168.243.131:9200"] index => "%{[@metadata][beat]} -%{[@metadata][version]} -%{+YYYY.MM.dd} " } stdout {codec => rubydebug } if "test-tag" in [tags] { elasticsearch { hosts => ["http://192.168.243.131:9200"] index => "logstash-test_tag-%{+YYYY.MM.dd} " } } if "nginx-tag" in [tags] { elasticsearch { hosts => ["http://192.168.243.131:9200"] index => "logstash-nginx_tag-%{+YYYY.MM.dd} " } } if "mylog-tag" in [tags] { elasticsearch { hosts => ["http://192.168.243.131:9200"] index => "logstash-mylog_tag-%{+YYYY.MM.dd} " } } } filter { grok { match => { "message" => "%{IP:client} %{WORD:method} %{URIPATHPARAM:request} %{NUMBER:bytes} %{NUMBER:duration} " } } }
启动 1 2 ./logstash -f ../config/logstash-test.conf nohup ./logstash -f ../config/logstash-test.conf>/dev/null 2>&1 &
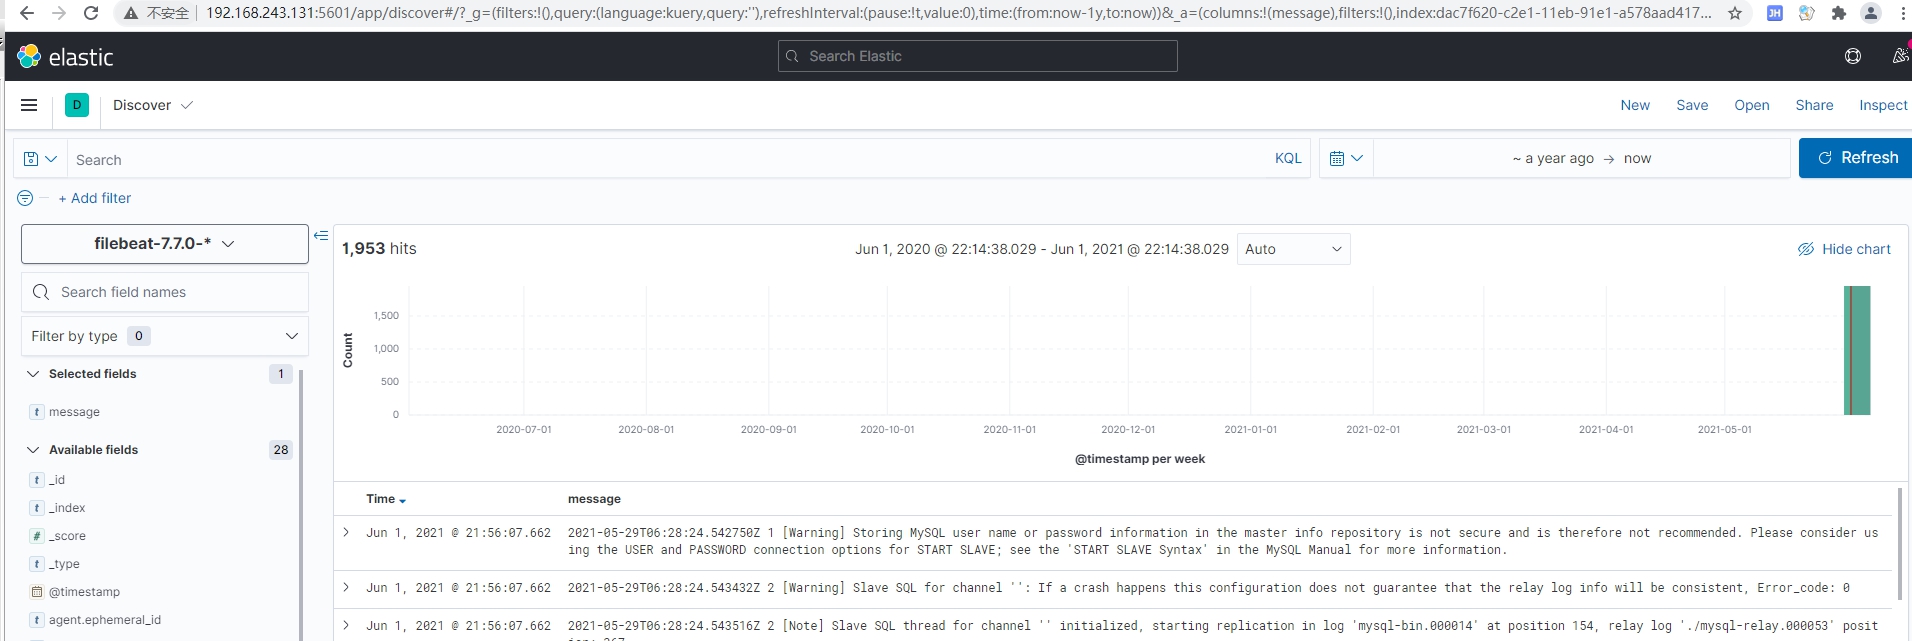
对 Elasticsearch 数据进行可视化,进行高效的搜索、可视化、分析等各种操作。
配置 1 2 3 4 5 server.port: 5601 server.host: "192.168.243.131" elasticsearch.hosts: ["http://192.168.243.131:9200"]
启动错误 当使用root账户执行启动命令./kibana会报如下错误
1 Kibana should not be run as root. Use --allow-root to continue.
因为Kibana与es一样,不能使用root用户启动,因为需要向es一样需要切换子账户启动,此时会报权限问题
1 2 3 4 5 6 7 8 9 10 log [22:28:17.934] [fatal][root] Error: Unable to write Kibana UUID file, please check the uuid.server configuration value in kibana.yml and ensure Kibana has sufficient permissions to read / write to this file. Error was: EACCES at writeUuidToFile (/usr/local/kibana/src/core/server/environment/resolve_uuid.js:101:11) at resolveInstanceUuid (/usr/local/kibana/src/core/server/environment/resolve_uuid.js:66:5) at EnvironmentService.setup (/usr/local/kibana/src/core/server/environment/environment_service.js:51:17) at Server.setup (/usr/local/kibana/src/core/server/server.js:167:30) at Root.setup (/usr/local/kibana/src/core/server/root/index.js:47:14) at bootstrap (/usr/local/kibana/src/core/server/bootstrap.js:99:5) at Command.<anonymous> (/usr/local/kibana/src/cli/serve/serve.js:169:5) FATAL Error: Unable to write Kibana UUID file, please check the uuid.server configuration value in kibana.yml and ensure Kibana has sufficient permissions to read / write to this file. Error was: EACCES
需要切换root账户对子账户进行授权chown -R elasticsearch kibana,再切换子账户启动
后台启动 1 nohup ./kibana > /dev/null 2>&1 &
杀死程序 安装head 1 2 3 4 git clone git://github.com/mobz/elasticsearch-head.git wget https://github.com/mobz/elasticsearch-head/archive/master.zip unzip master.zip
安装node 1 2 3 4 5 6 7 8 9 wget https://npm.taobao.org/mirrors/node/latest-v14.x/node-v14.6.0-linux-x64.tar.gz tar -zxvf node-v14.6.0-linux-x64.tar.gz mv node-v10.14.1node-v14.6.0-linux-x64 node-v14.6.0 vi /etc/profile export NODE_HOME=/usr/local /node-v14.6.0export PATH=$PATH :$NODE_HOME /binsource /etc/profile
配置 添加hostname:'*'
1 2 3 4 5 6 7 8 9 10 11 vi Gruntfile.js connect: { server: { options: { hostname:'*' , port: 9100 , base: '.' , keepalive: true } } }
启动 1 2 3 4 5 6 cd elasticsearch-head/npm install npm run start nohup npm run start> /dev/null 2>&1 &
npm install出错
1 2 3 4 5 6 7 8 9 10 npm ERR! code ELIFECYCLE npm ERR! errno 1 npm ERR! phantomjs-prebuilt@2.1.16 install: `node install.js` npm ERR! Exit status 1 npm ERR! npm ERR! Failed at the phantomjs-prebuilt@2.1.16 install script. npm ERR! This is probably not a problem with npm. There is likely additional logging output above. npm ERR! A complete log of this run can be found in : npm ERR! /root/.npm/_logs/2021-05-31T15_13_24_681Z-debug.log
执行npm install phantomjs-prebuilt@2.1.14 --ignore-scripts之后再重新npm install
登录问题 当es集群配置了密码访问时,需要执行以下操作:
在es的master节点config/elasticsearch.yml上增加以下配置http.cors.allow-headers:"Authorization,X-Requested-With,Content-Length,Content-Type"
在访问head插件页面的路径上加上?auth_user=elastic&auth_password=pwd


